Tutorial · 8 steps · about 10 minutes
Publish your first course in Chapters
By Gill · builder of Chapters LMS · Updated September 2026
A course in Chapters isn't for sale until you press Publish. Publishing is what creates the matching product in your Shopify store — until then, there's nothing for a customer to buy. This tutorial goes from an empty dashboard to a live course, showing every screen along the way.
What you need
- Chapters installed and the free plan activated (no charge until you sell).
- A course title and a price — even a rough one. You can change both later.
- At least one lesson's worth of content: a video file, or a few paragraphs of text.
Step 1: Open Chapters and press Create course
In your Shopify admin, open Apps → Chapters LMS. The dashboard shows your courses, lessons and students. Press Create course in the Recent Courses card — it's also on the Courses page in the left sidebar.

Step 2: The course wizard opens
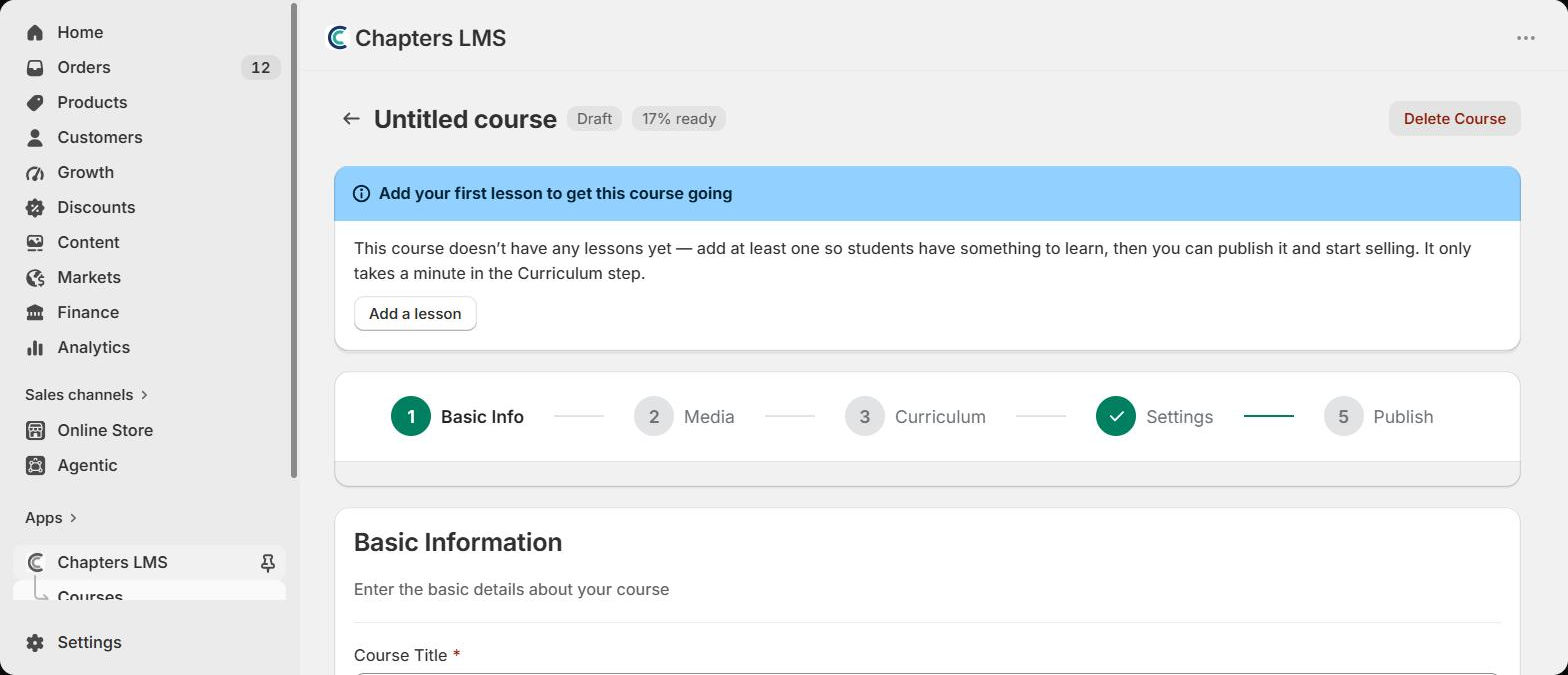
Chapters creates a draft called Untitled course and opens the five-step wizard: Basic Info, Media, Curriculum, Settings, Publish. Everything you type saves automatically, so you can leave and come back.
The blue banner at the top is the app keeping score for you: a course needs at least one lesson before it can be published, and the banner changes as you get closer.
Step 3: Fill in the basics
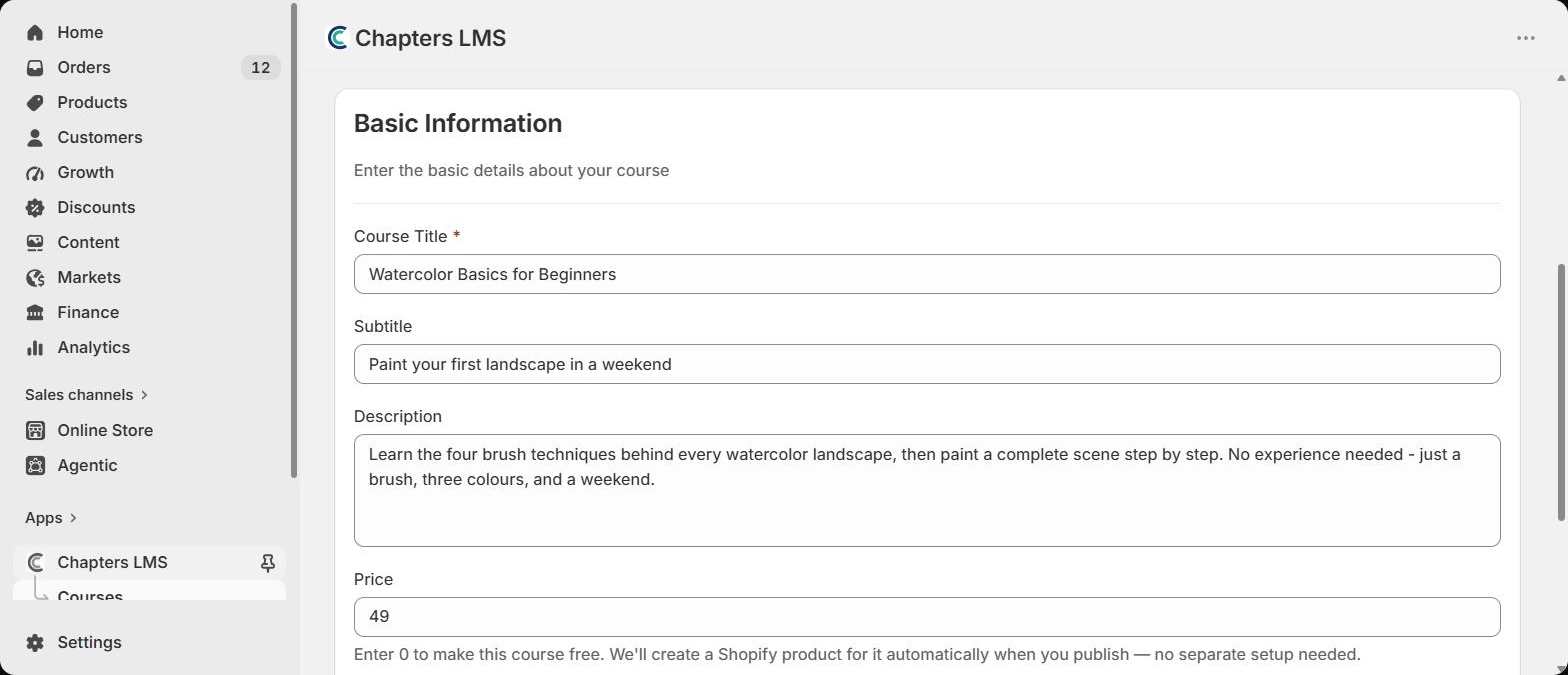
Give the course a title — this becomes the product name in your store. The subtitle is a one-line tagline; the description is what students read before they buy, and it becomes the product description too.
Write the description as a promise, not a table of contents: what will the student be able to do afterwards?
Step 4: Set the price, then Save & Continue
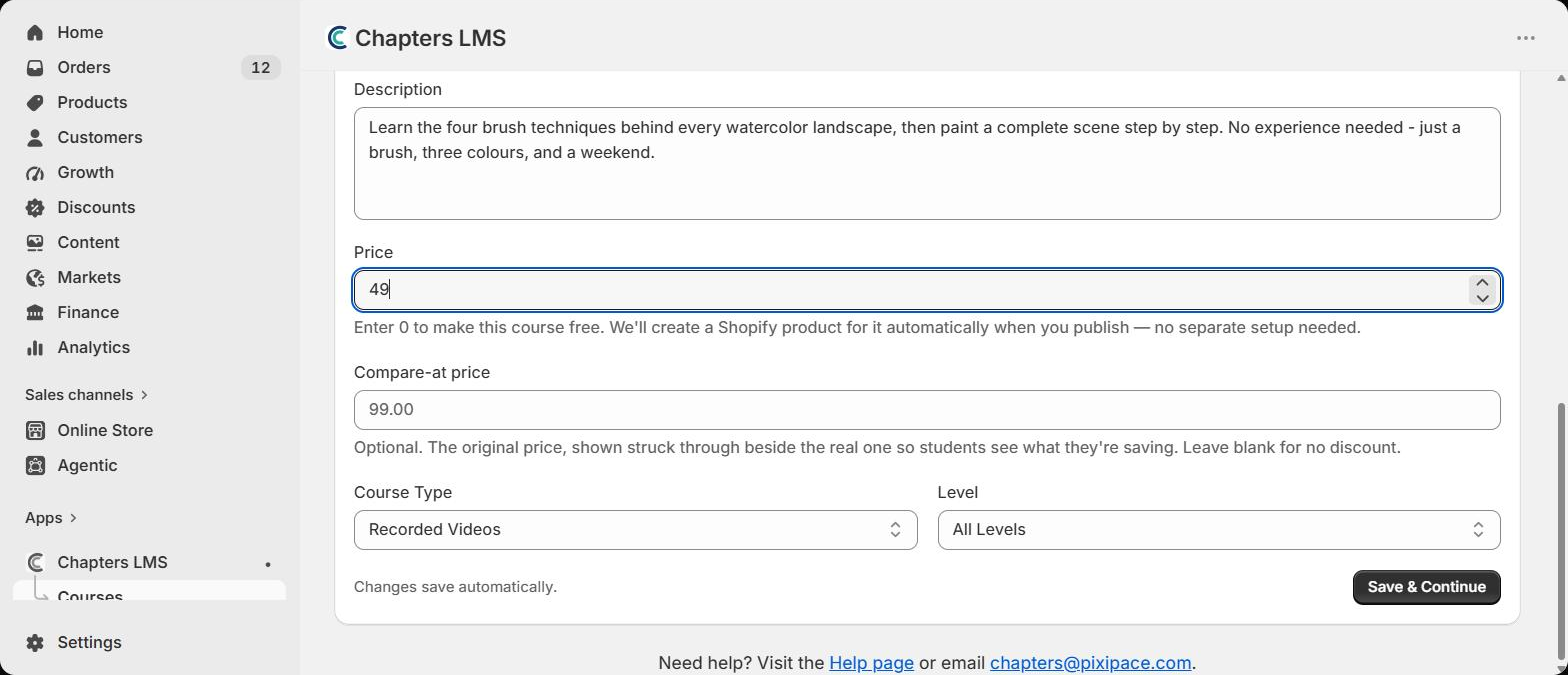
Enter the price in your store's currency. Type 0 to make the course free — students still go through checkout at no charge, which is how they get enrolled. The optional compare-at price shows a struck-through original price next to the real one.
Pick a course type (recorded videos, live classes, or both) and a level, then press Save & Continue.
Step 5: Media — optional, skip it for now
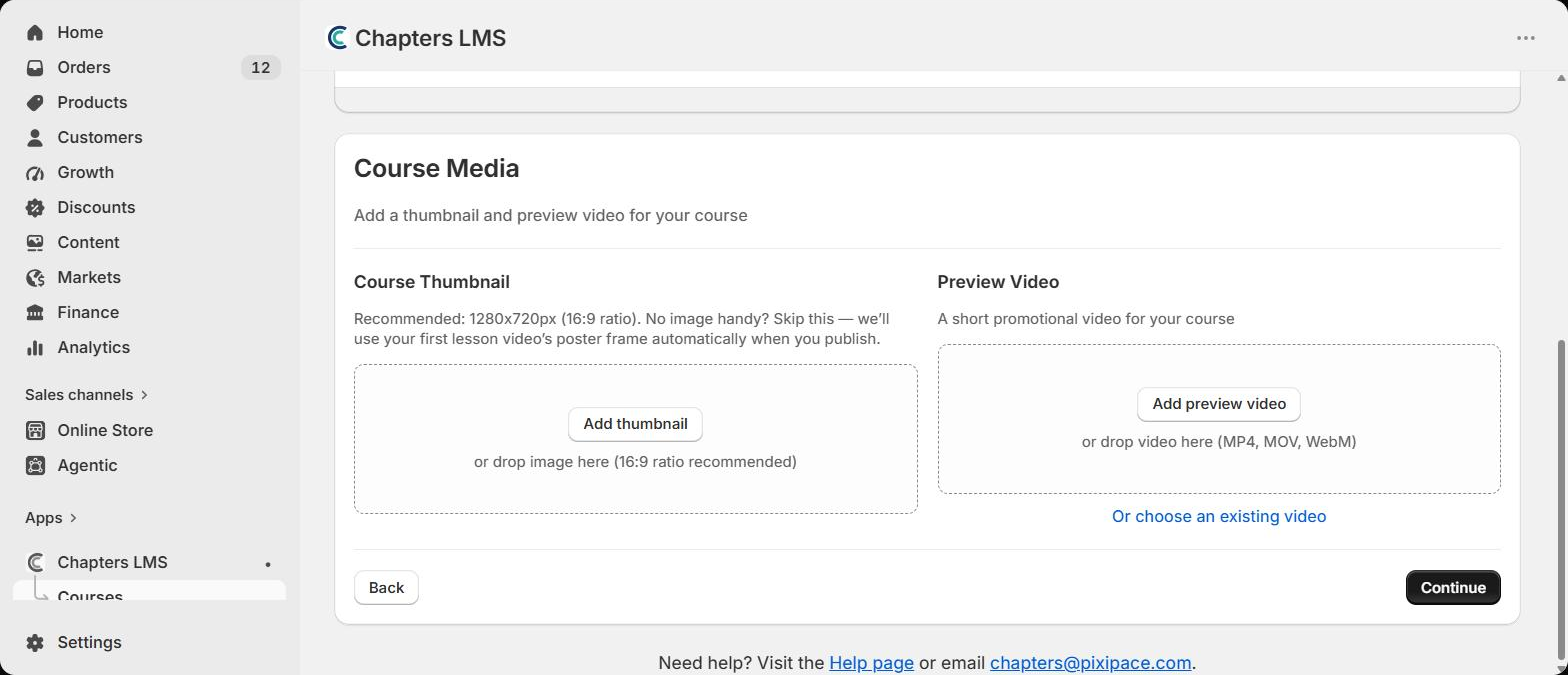
You can add a thumbnail (1280×720 works best) and a short preview video here. Neither is required to publish. If you skip the thumbnail, Chapters uses the poster frame of your first lesson video. Press Continue.
Step 6: Add your first chapter
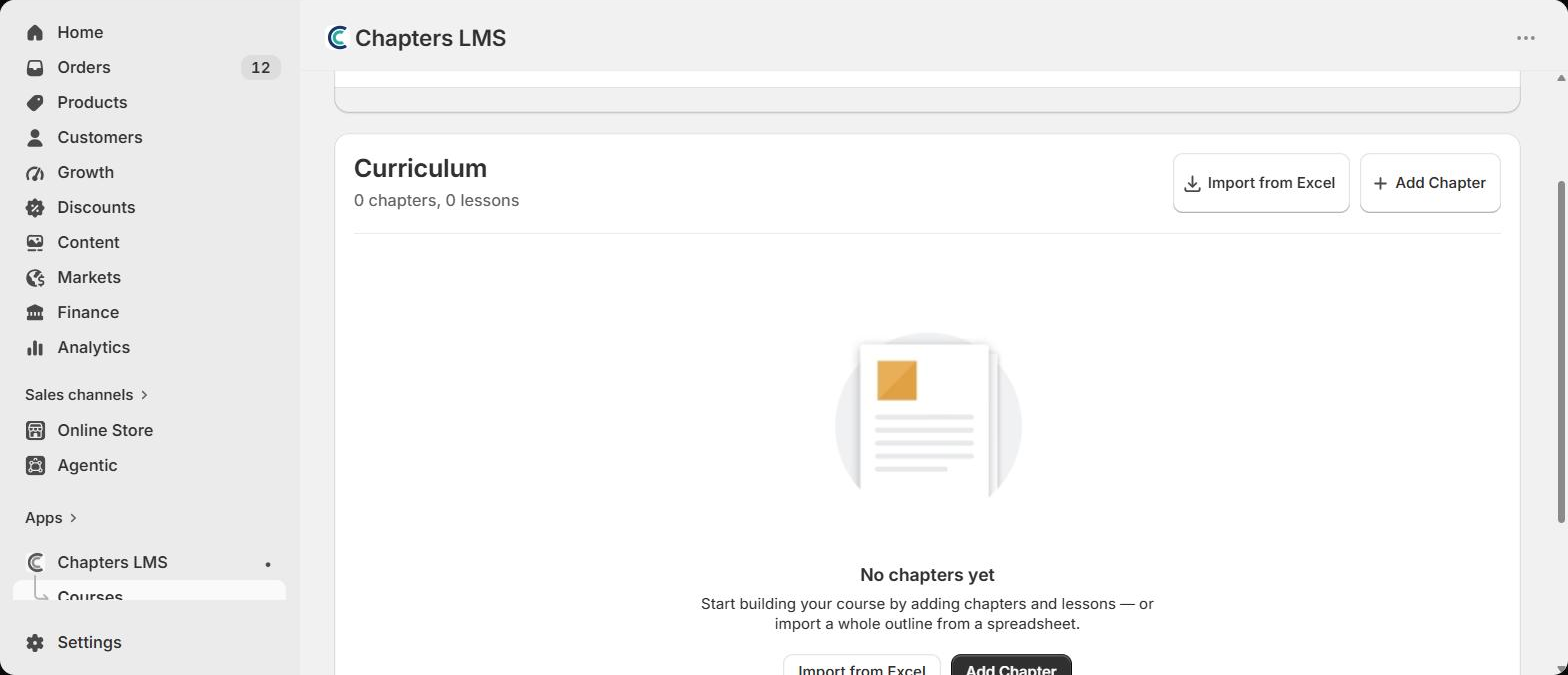
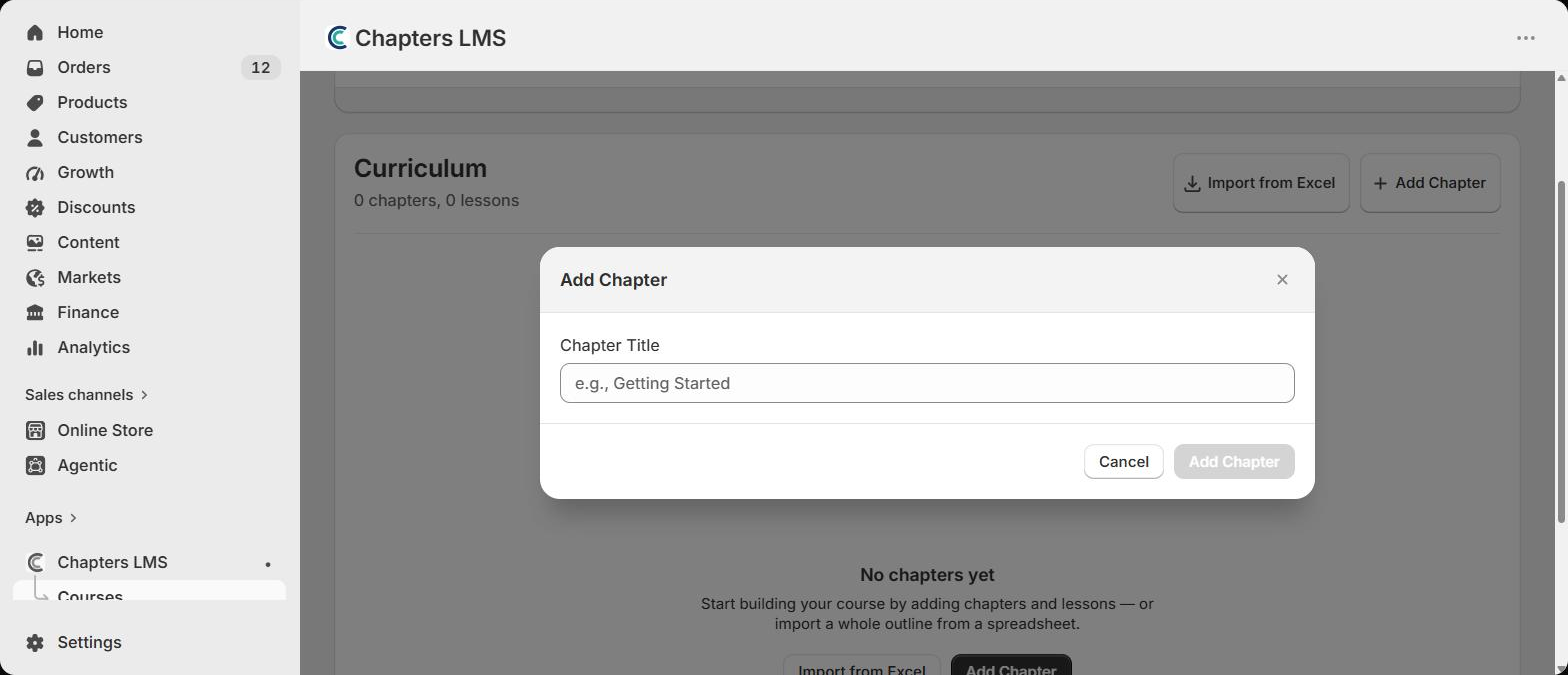
The Curriculum step starts empty. Press Add Chapter, name it, and confirm. Chapters are just groups — most courses use a handful, like Getting Started, The Basics, Your First Project.
Already have an outline in a spreadsheet? Import from Excel builds every chapter and lesson from it in one go.
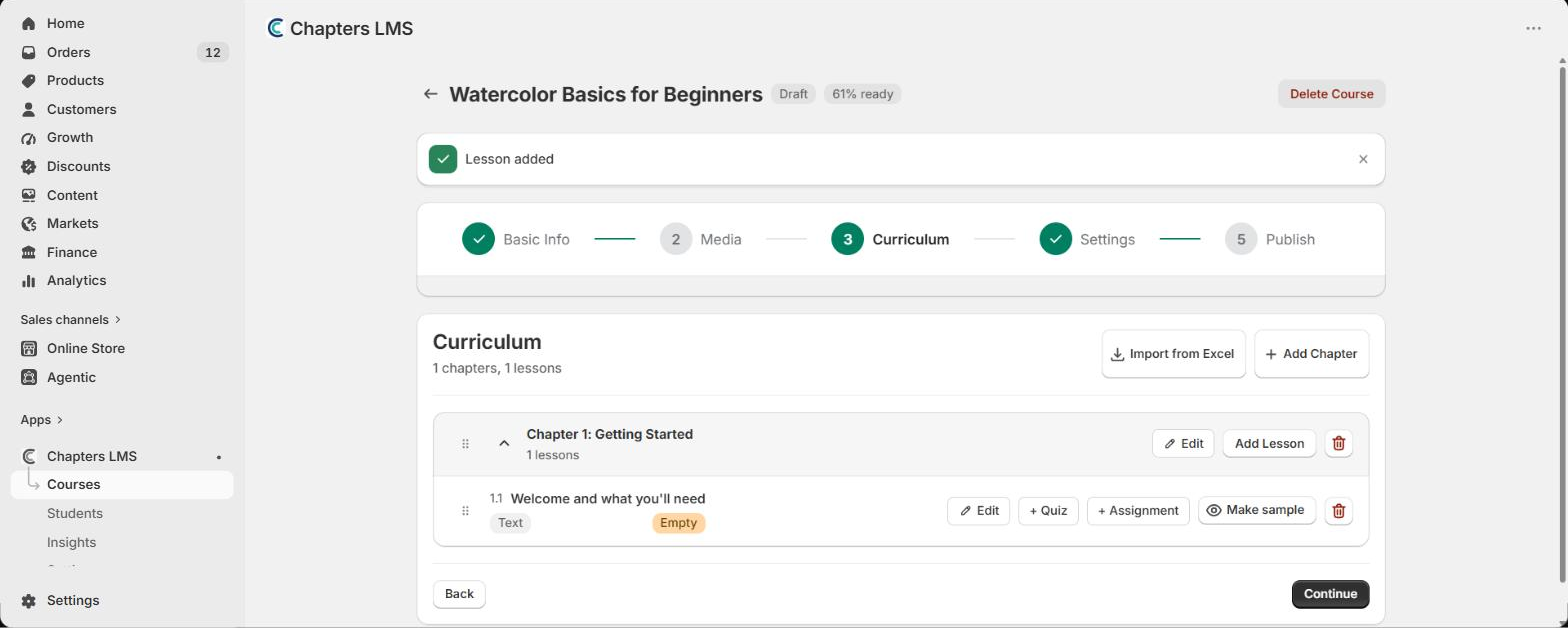
Step 7: Add lessons to the chapter
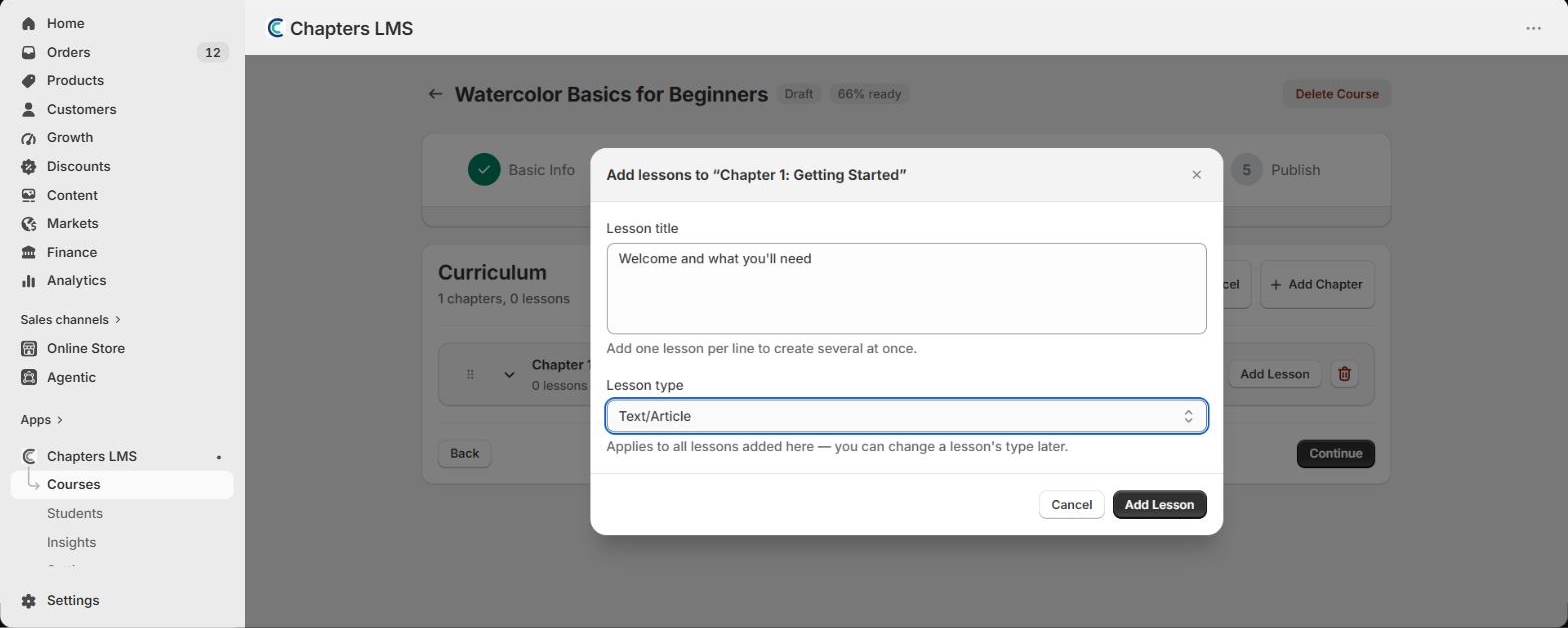
Press Add Lesson on the chapter. You can add several at once — one title per line — and pick the type: video, text/article, or live class. You can change a lesson's type later.
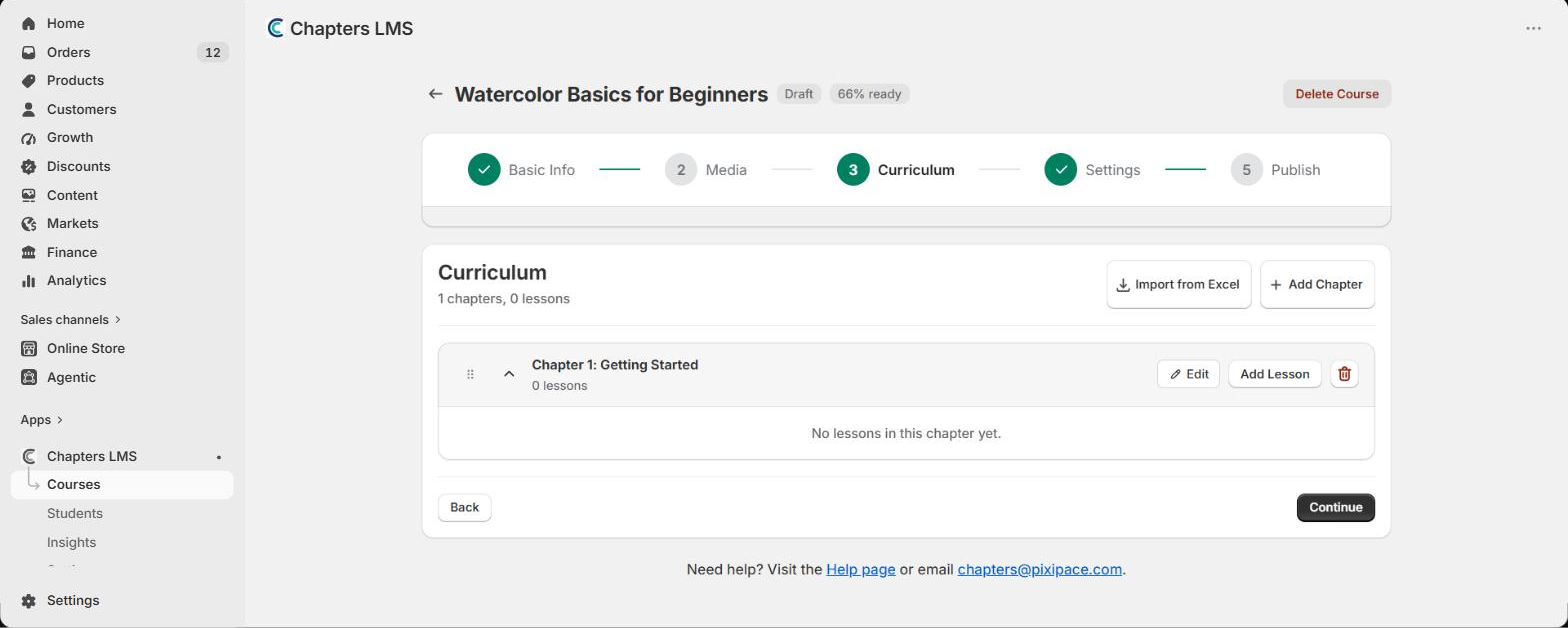
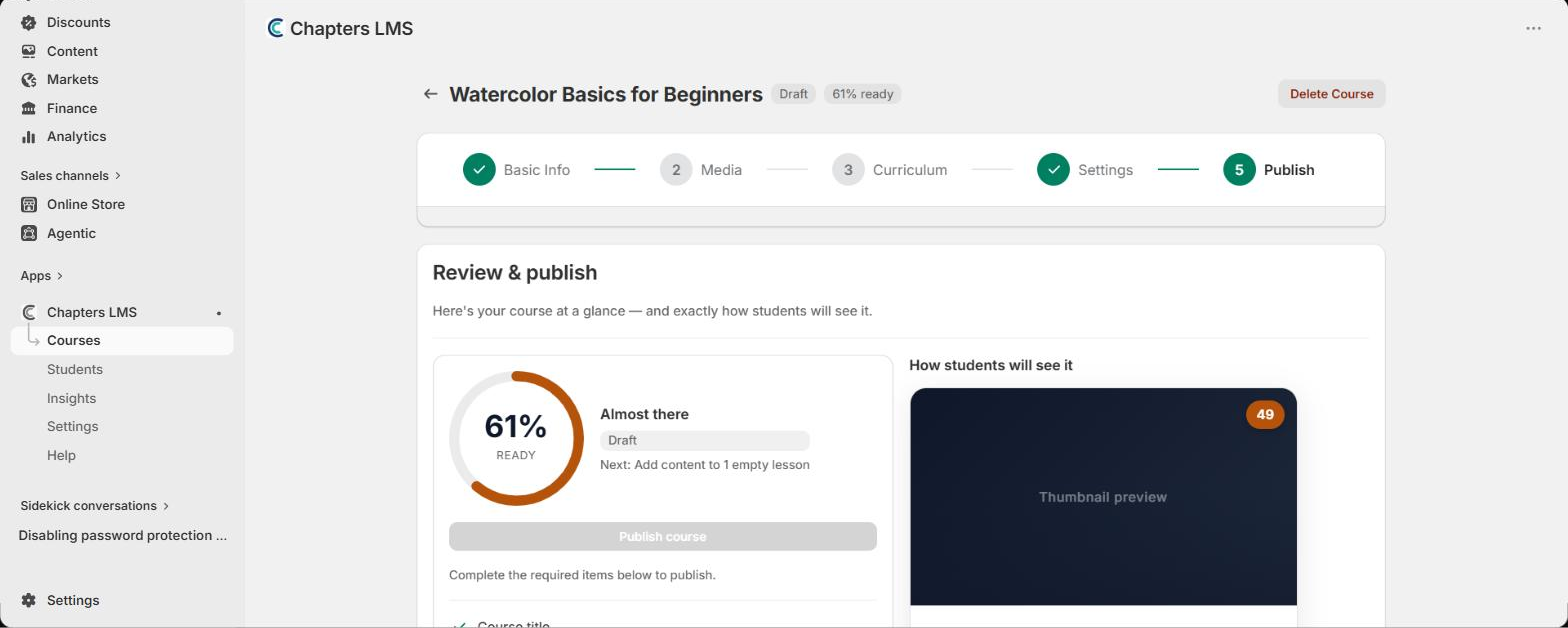
A new lesson is empty until you give it content — a video upload, or text for an article lesson. Press Edit on the lesson to add it. This is the step most people skip, and it's the one thing that blocks publishing:
Step 8: Publish
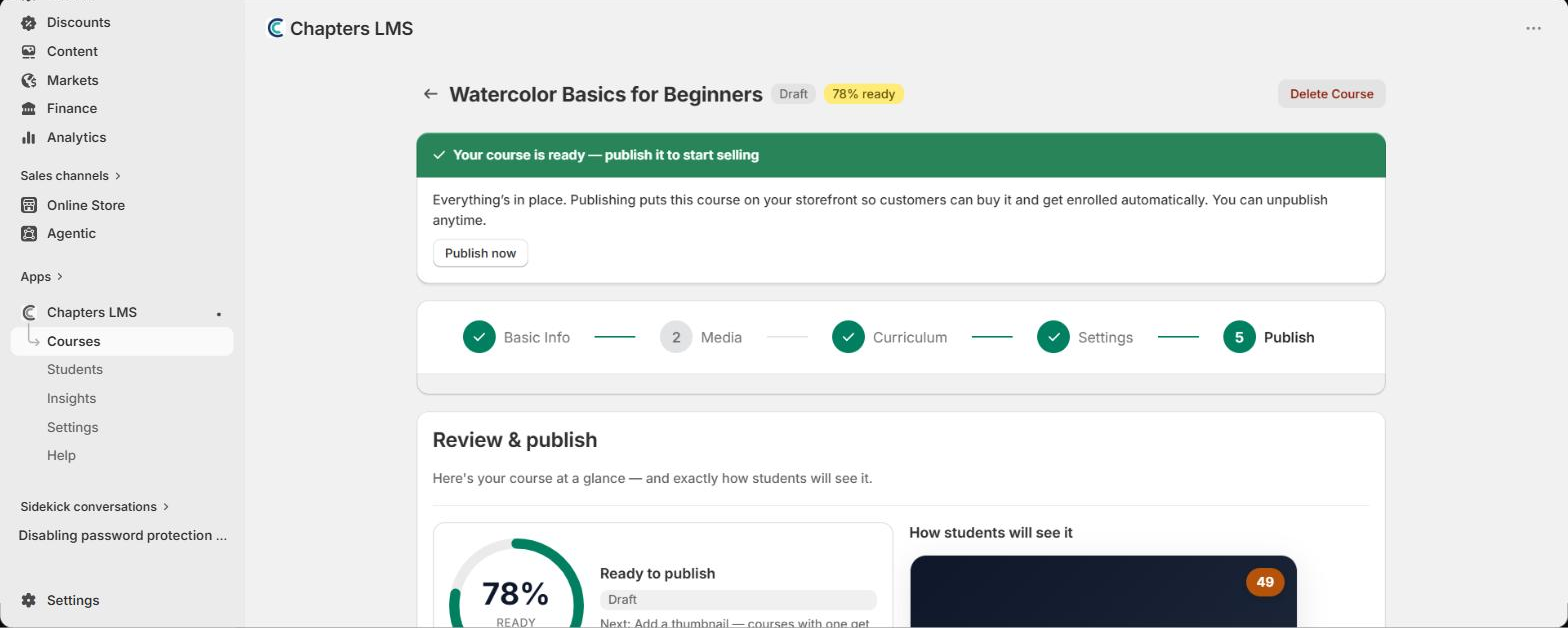
Once every lesson has content, the banner turns green: Your course is ready — publish it to start selling. Press Publish now.
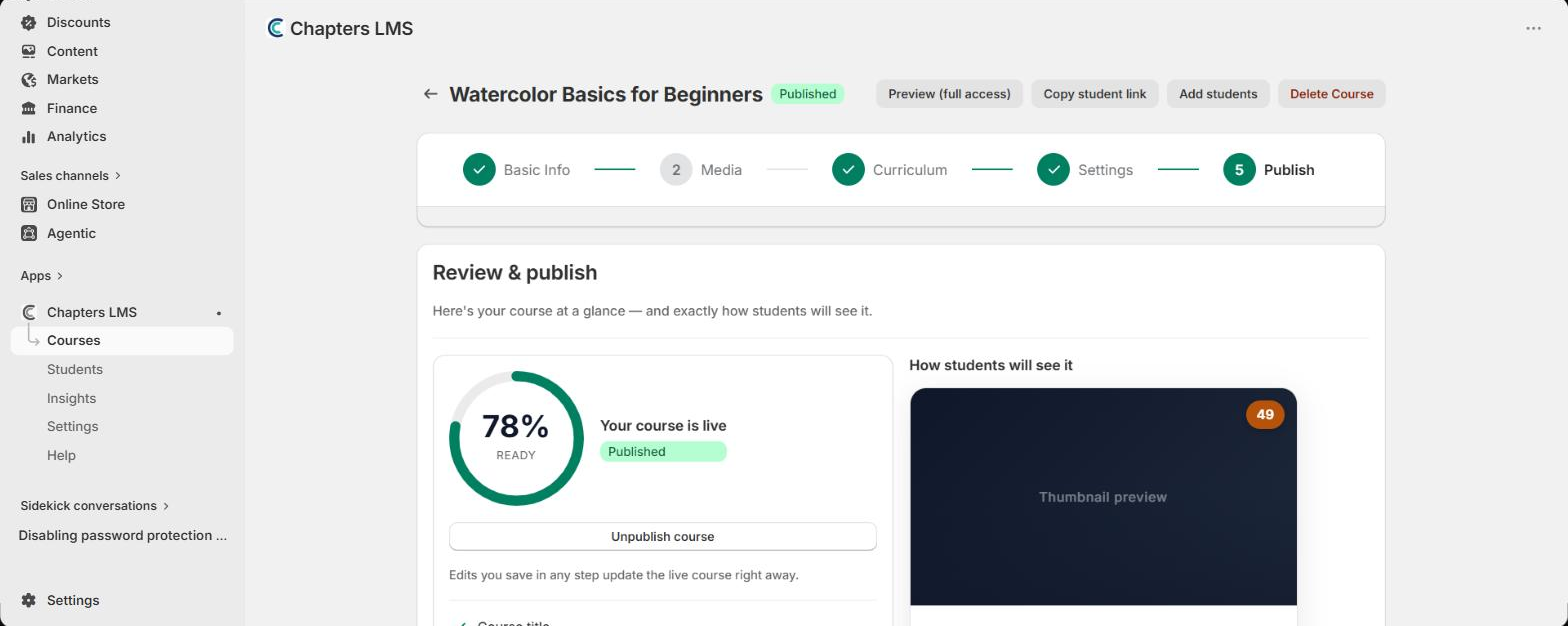
That's it. The course is live, and three new buttons appear: Preview (see it as a student), Copy student link, and Add students (enroll someone by hand without a purchase).
What happened behind the scenes
Open Products in your Shopify admin and you'll find a new product with the course's name. Chapters created it the moment you published: status Active, product type Course, inventory not tracked, and no shipping — so a course-only cart never asks for a shipping address.
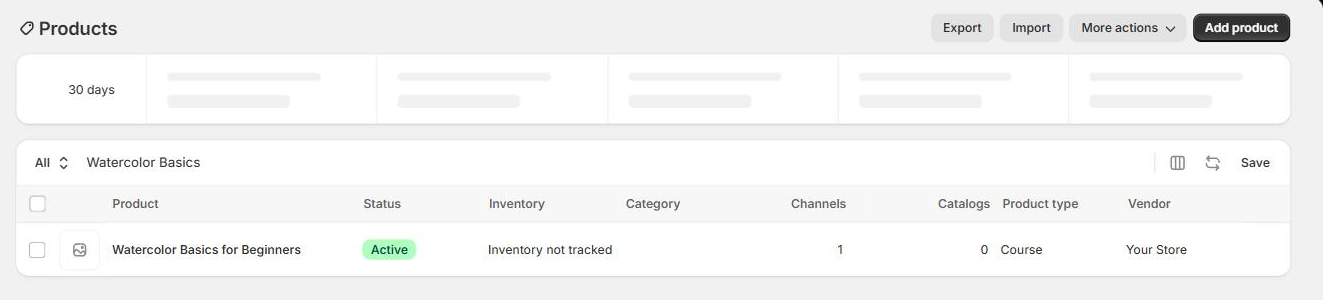
Because it's a normal product, everything you already know applies: discount codes, collections, Shopify Markets for local currencies, your theme's product page. When someone buys it, the payment lands in your regular Shopify checkout and Chapters enrolls them automatically.
If something's not right
The Publish button is greyed out+
Look at the “Next:” line under the readiness score — it names the one thing that's missing. The usual causes: a lesson with a title but no content (see Step 7), no price set (0 counts as set), or the course still called “Untitled course”.
I can't find the product in Shopify+
It's only created when you publish. In Products, search for the course title, or filter by product type “Course”.
Customers can't see the course on my store+
Publishing makes the course buyable; showing it on your storefront is the next step — add the Chapters course blocks to your theme so the product page shows the curriculum and your homepage shows a course grid. Step 3 of the setup guide walks through it.
I published by mistake+
Press Unpublish course on the Publish step. The product is taken off sale; existing students keep their access.
Next
Put the course on your storefront: add the theme blocks (about 5 minutes), then run the launch test — buy your own course once and watch the whole journey. Stuck anywhere? Email chapters@pixipace.com and I'll look at your store.