Tutorial · 4 steps · about 5 minutes
Put your courses on your storefront with theme blocks
By Gill · builder of Chapters LMS · Updated September 2026
When you publish a course, Chapters creates its Shopify product for you. You still need somewhere for customers to find it. Two theme blocks do that: Course Catalog puts a grid of every published course on any page, and Course Details turns the standard product page into a proper course page. No collections, no menu links, no product-page editing.
What you need
- At least one published course.
- An Online Store 2.0 theme (any theme from the current Theme Store). Older themes have no Apps tab in the section picker.
Step 1: Add the Course Catalog section
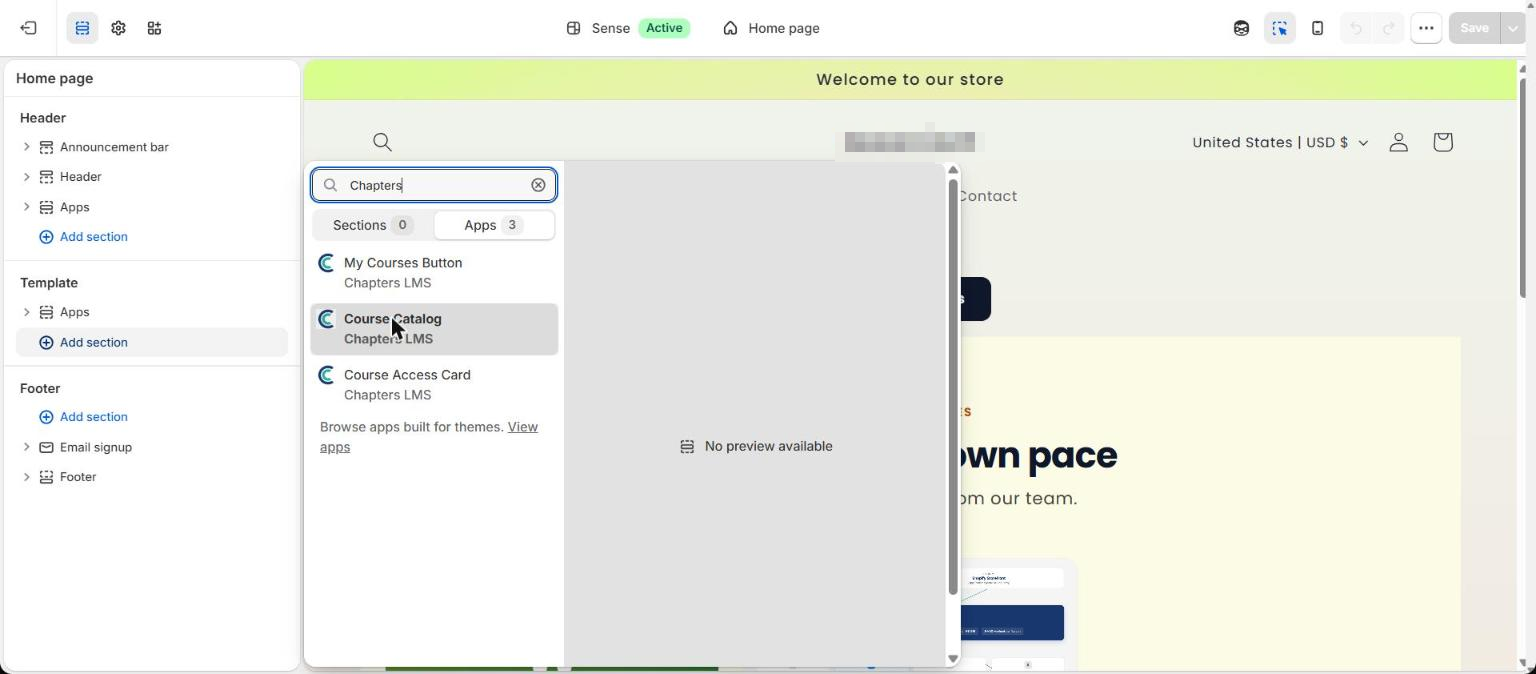
In Shopify admin go to Online Store → Themes and press Customize on your live theme. The editor opens on your homepage. Under Template, press Add section, open the Apps tab and search for Chapters. Pick Course Catalog. It drops in wherever you clicked; drag it up or down like any other section.
Step 2: Name it and save
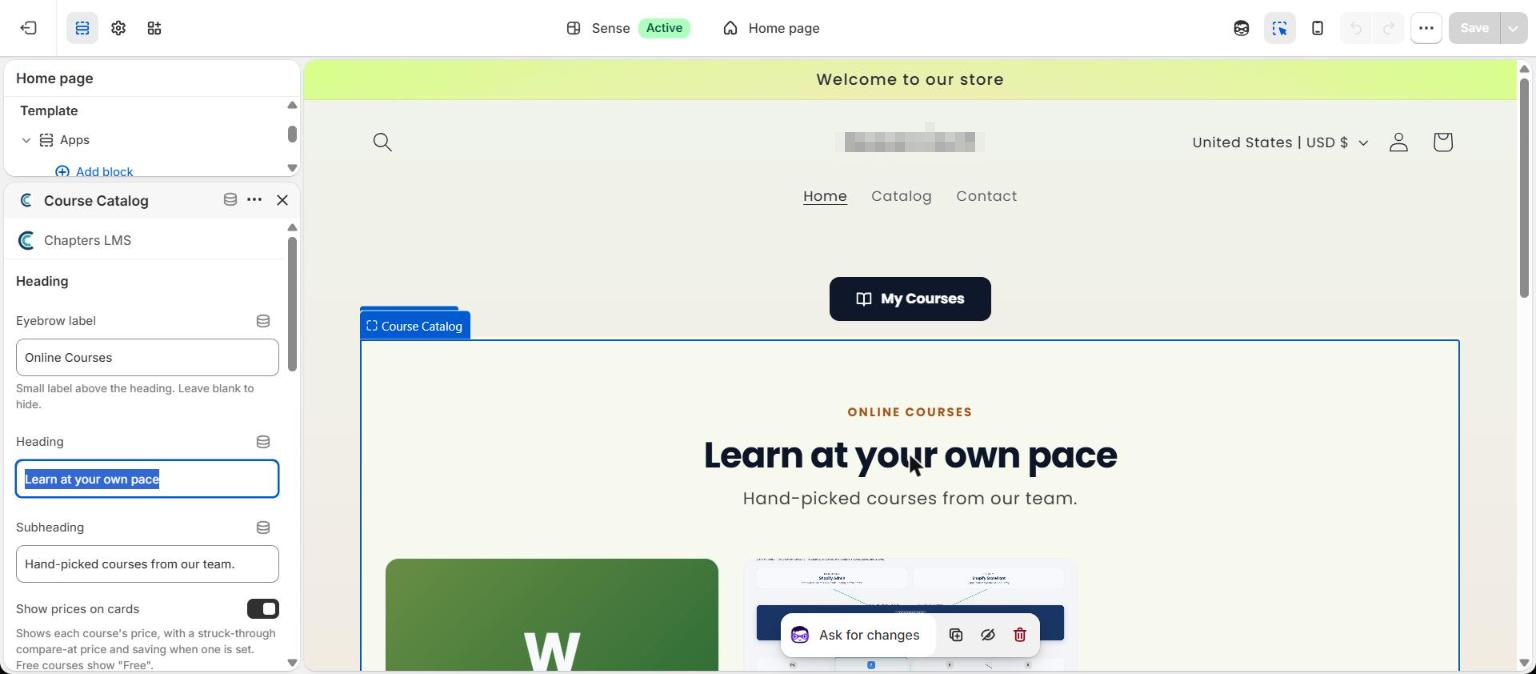
Click the new section to open its settings. Set the small eyebrow label, the heading and a one-line subheading. Leave Show prices on cards on, then press Save. That's the catalog done: it reads your published courses on its own, so every course you publish from now on appears here automatically.
Step 3: Add Course Details to your product template
Use the page selector at the top of the editor to open Products → Default product. Press Add section → Apps again and add Course Details, then Course Access Card below it. Save.
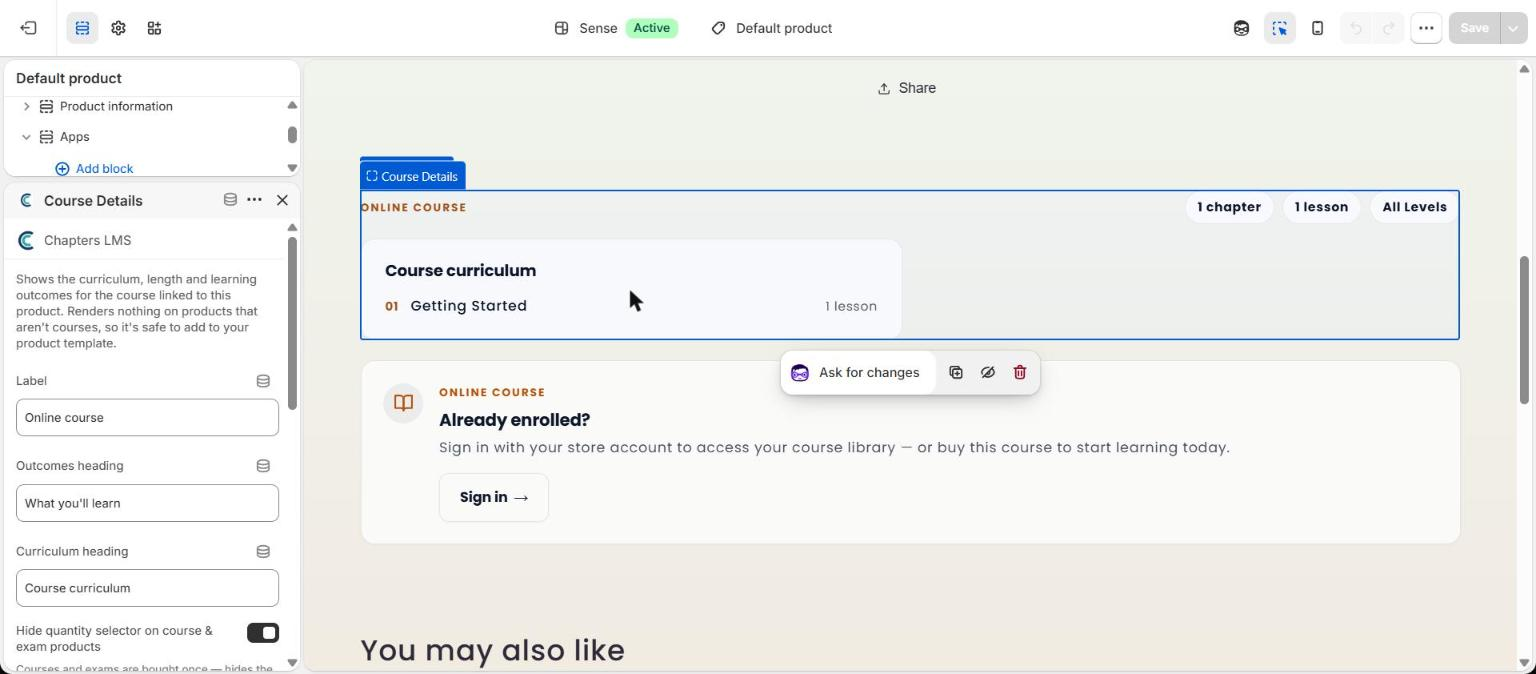
Both blocks render only on course products, so they're safe on the product template your physical products share.
Step 4: Check the storefront
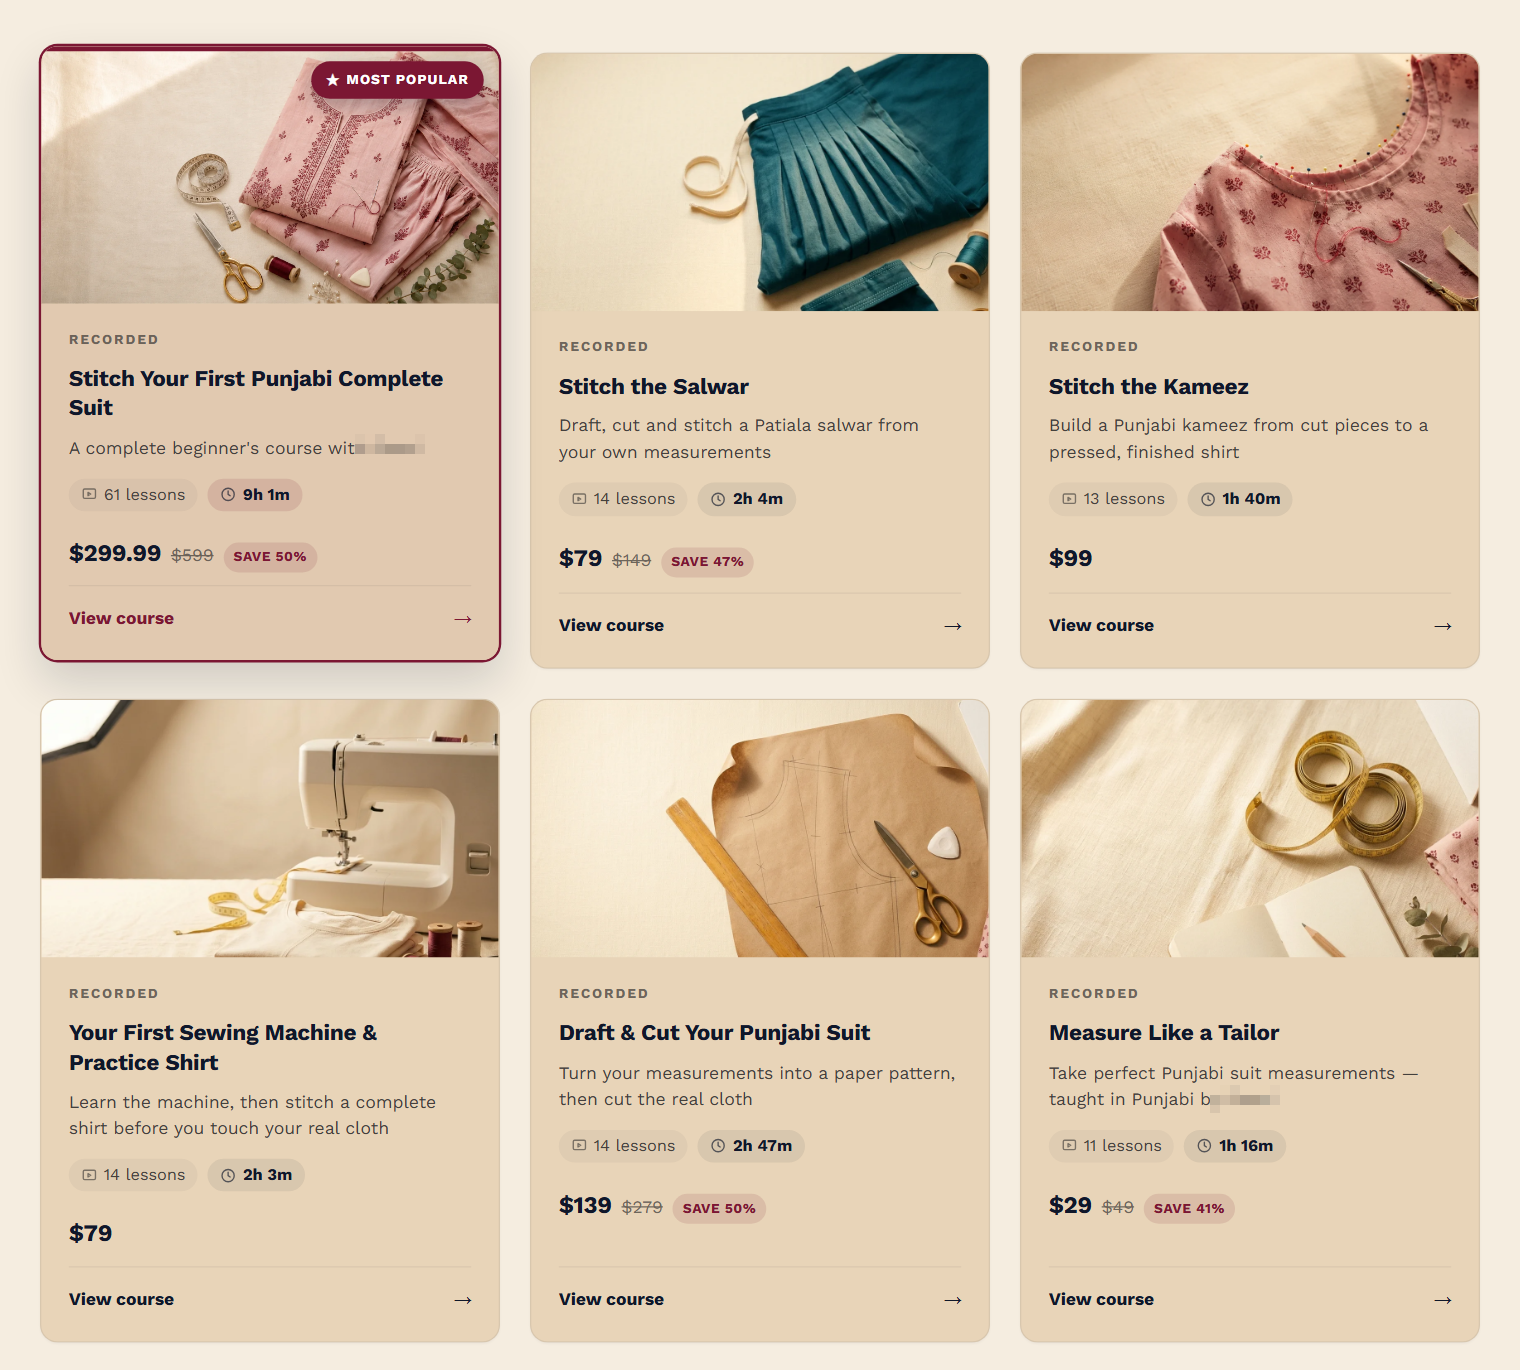
Open your store. The catalog grid shows each course's thumbnail, type, lesson count, length and price, with a struck-through compare-at price and a Save badge when you set one. Free courses show Free. Click a card and you land on the course page with the curriculum and buy button.
Why there's nothing else to build
- The product already exists. Publishing a course creates it, with the price, description and thumbnail you entered in Chapters.
- The product page becomes the course page. Course Details adds what a physical-product template lacks: chapter and lesson counts, level, outcomes and the full curriculum. It also removes the quantity stepper and the duplicate “Buy it now” button.
- The catalog keeps itself up to date. It lists every published course and links straight to each one. Unpublish a course and it disappears; publish a new one and it shows up.
Want a dedicated Courses page? Create a page in Online Store → Pages, open it in the editor, add the Course Catalog section there, and link the page from your menu.
If something's not right
Add section has no Apps tab+
Your theme is a vintage (pre-2.0) theme. Update it, or install a current theme from the Theme Store; app blocks need Online Store 2.0.
The catalog is empty+
It only lists published courses. Open the course in Chapters and check the Publish step. Just published? Give it a minute and reload.
The course shows twice on the homepage+
You added the section twice, usually once from the dashboard checklist and once by hand. Click the extra one and press Remove section.
My physical products look different now+
They don't. Course Details and Course Access Card render nothing on non-course products. If something changed, check whether you turned on Hide quantity selector for a product that isn't a course.
Next
Selling to more than one country? Show prices in your customer's currency. Then give students a way back in: add the My Courses button and My Learning in their account. Stuck? Email chapters@pixipace.com and I'll look at your store.